
-
Table of contents
- Step 1 – Easter eggs: Cutting logs to size & sanding
- Step 2 – Easter eggs: Glueing timber onto plywood panel
- Step 4 – Sanding
- Step 5 – Done!
-
Material list for bunny & eggs
- Plywood panel (approx. 6 mm thickness)
- Small logs (length approx. 30 cm, varying diameters, approx. 25 – 45 mm)
- Wood glue
- Printed templates
- Oak board for decorative bunny (approx. 20 x 20 cm)
-
Tools & Machines
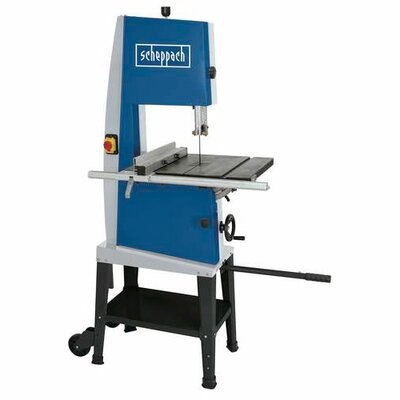
- Band saw (e.g. Basa 1 or HBS261)
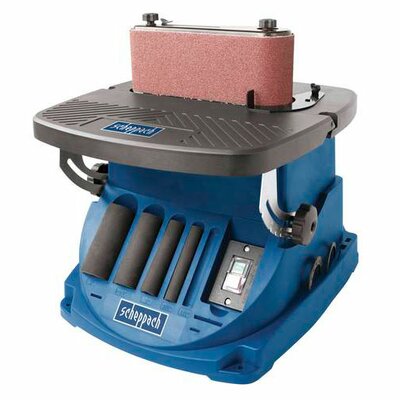
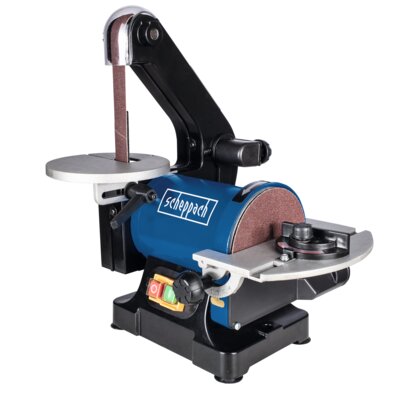
- 2 belt sanders, fixed (e.g. OSM600 and BTS700)
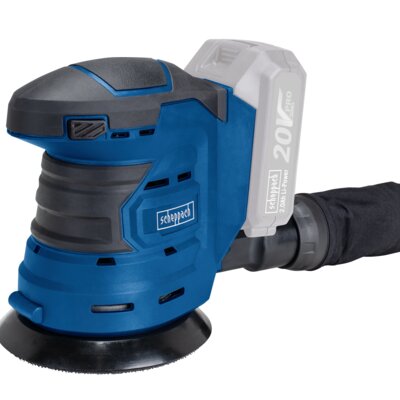
- Rotary sander (e.g. COS125-20ProS)
- Abrasive paper
- Extraction system, if available (e.g. DC100)
-
Protective equipment
- Safety goggles
- Work clothing
- Hearing protection
- Dust protection mask (for sanding)
- Step 1 – Easter eggs: Cutting logs to size & sanding
- Step 2 – Easter eggs: Glueing timber onto plywood panel
- Step 4 – Sanding
- Step 5 – Done!


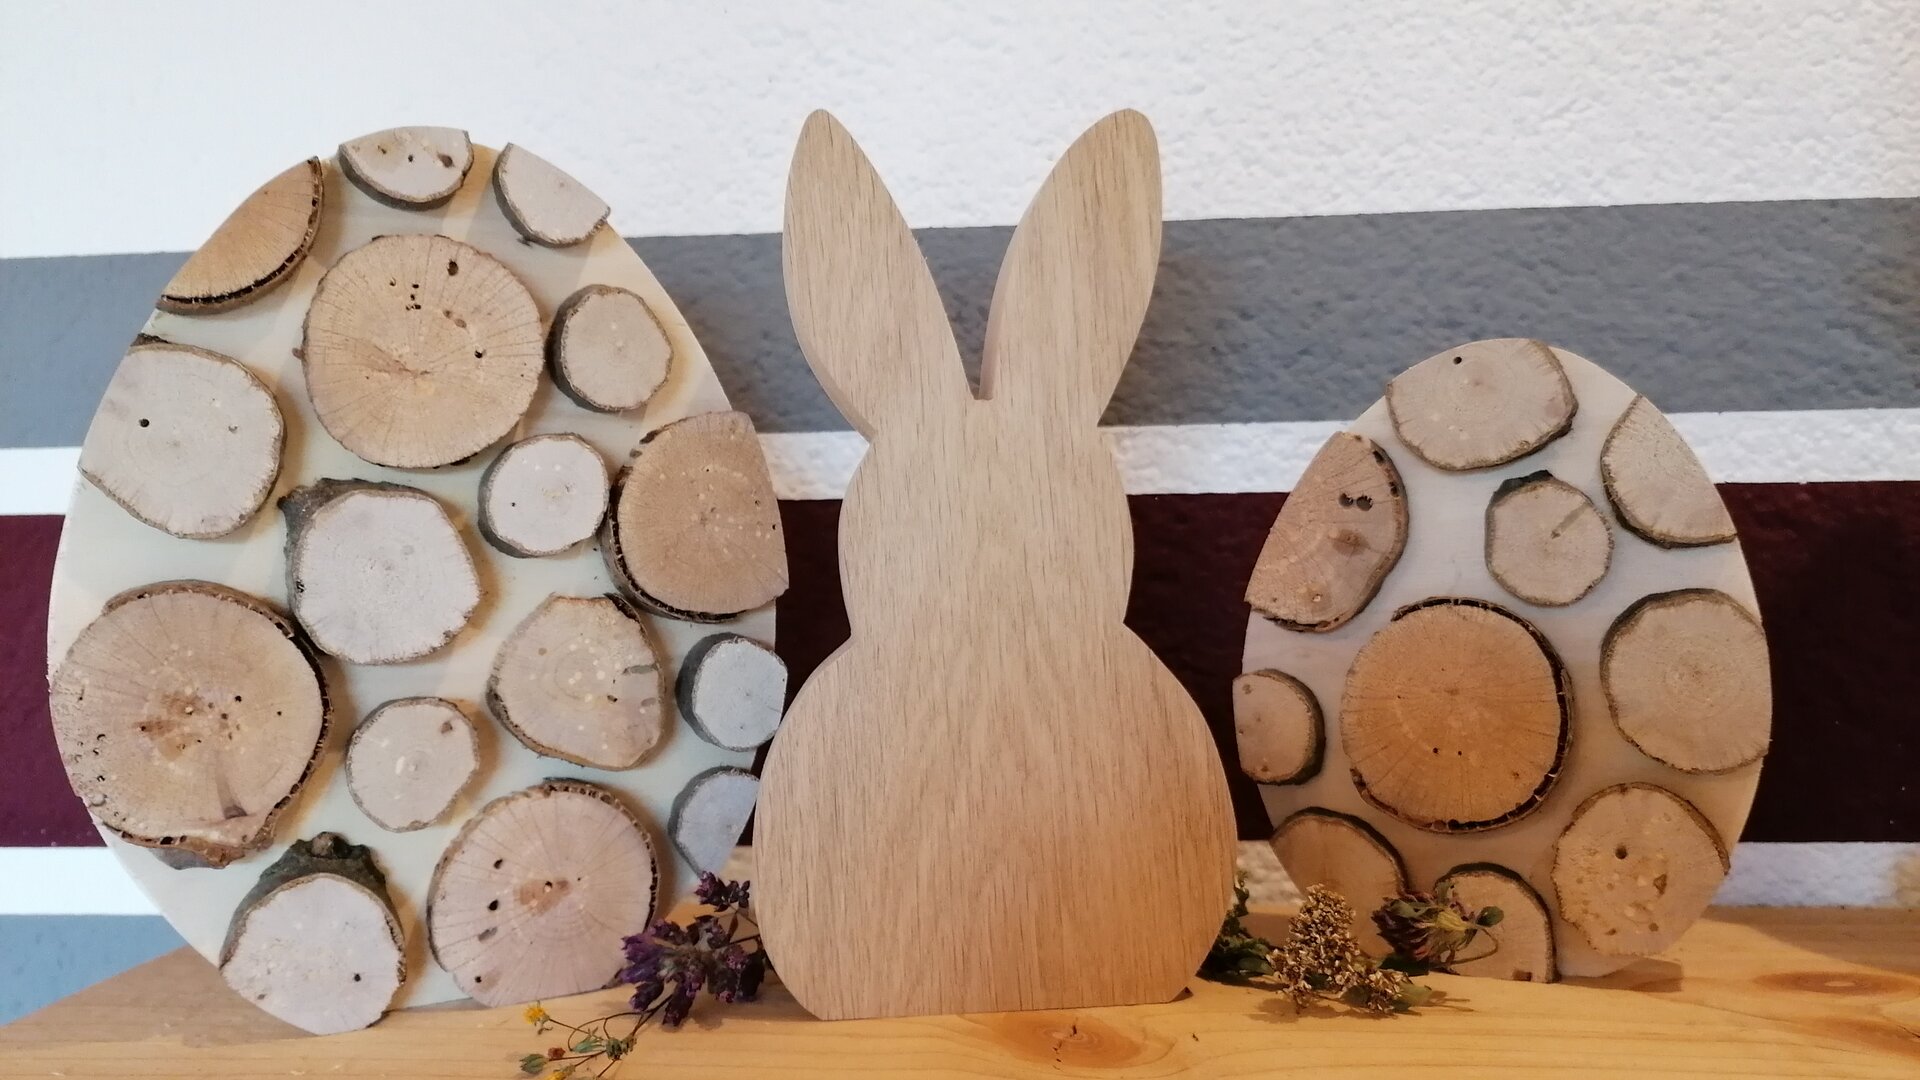
Prepare the materials you need for the decorative Easter eggs. Then, using the band saw’s mitre gauge longitudinal stop (scheppach HBS261 would be suitable here, for example), cut and saw the logs to a thickness of about 1 cm. Afterwards, they can be sanded with a belt sander, such as the OSM600, to ensure a smooth surface.


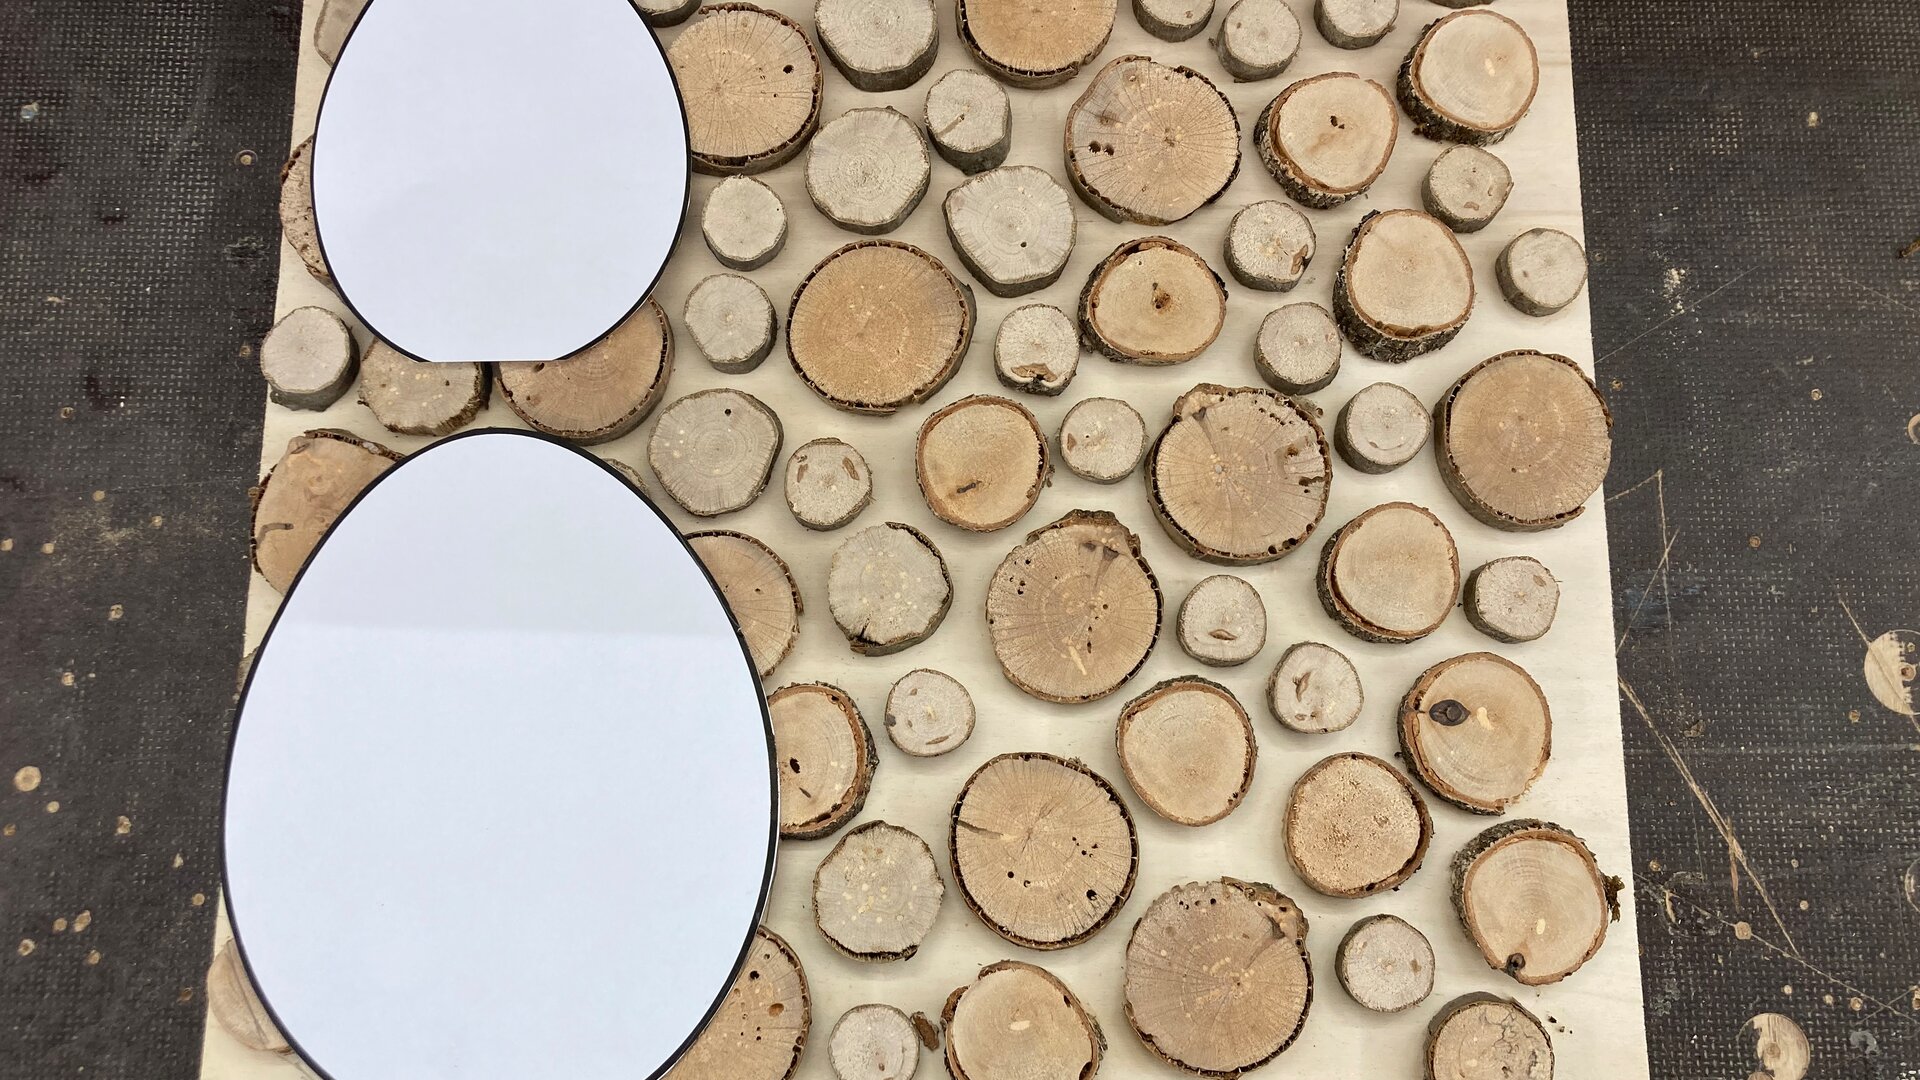
Now place the pieces on the plywood panel as you see fit, then glue them. If you intend to display the decorative eggs outside, make sure the wood glue is water-proof.
Step 3 – Easter bunny & Easter eggs: Drawing using the template & sawing to size
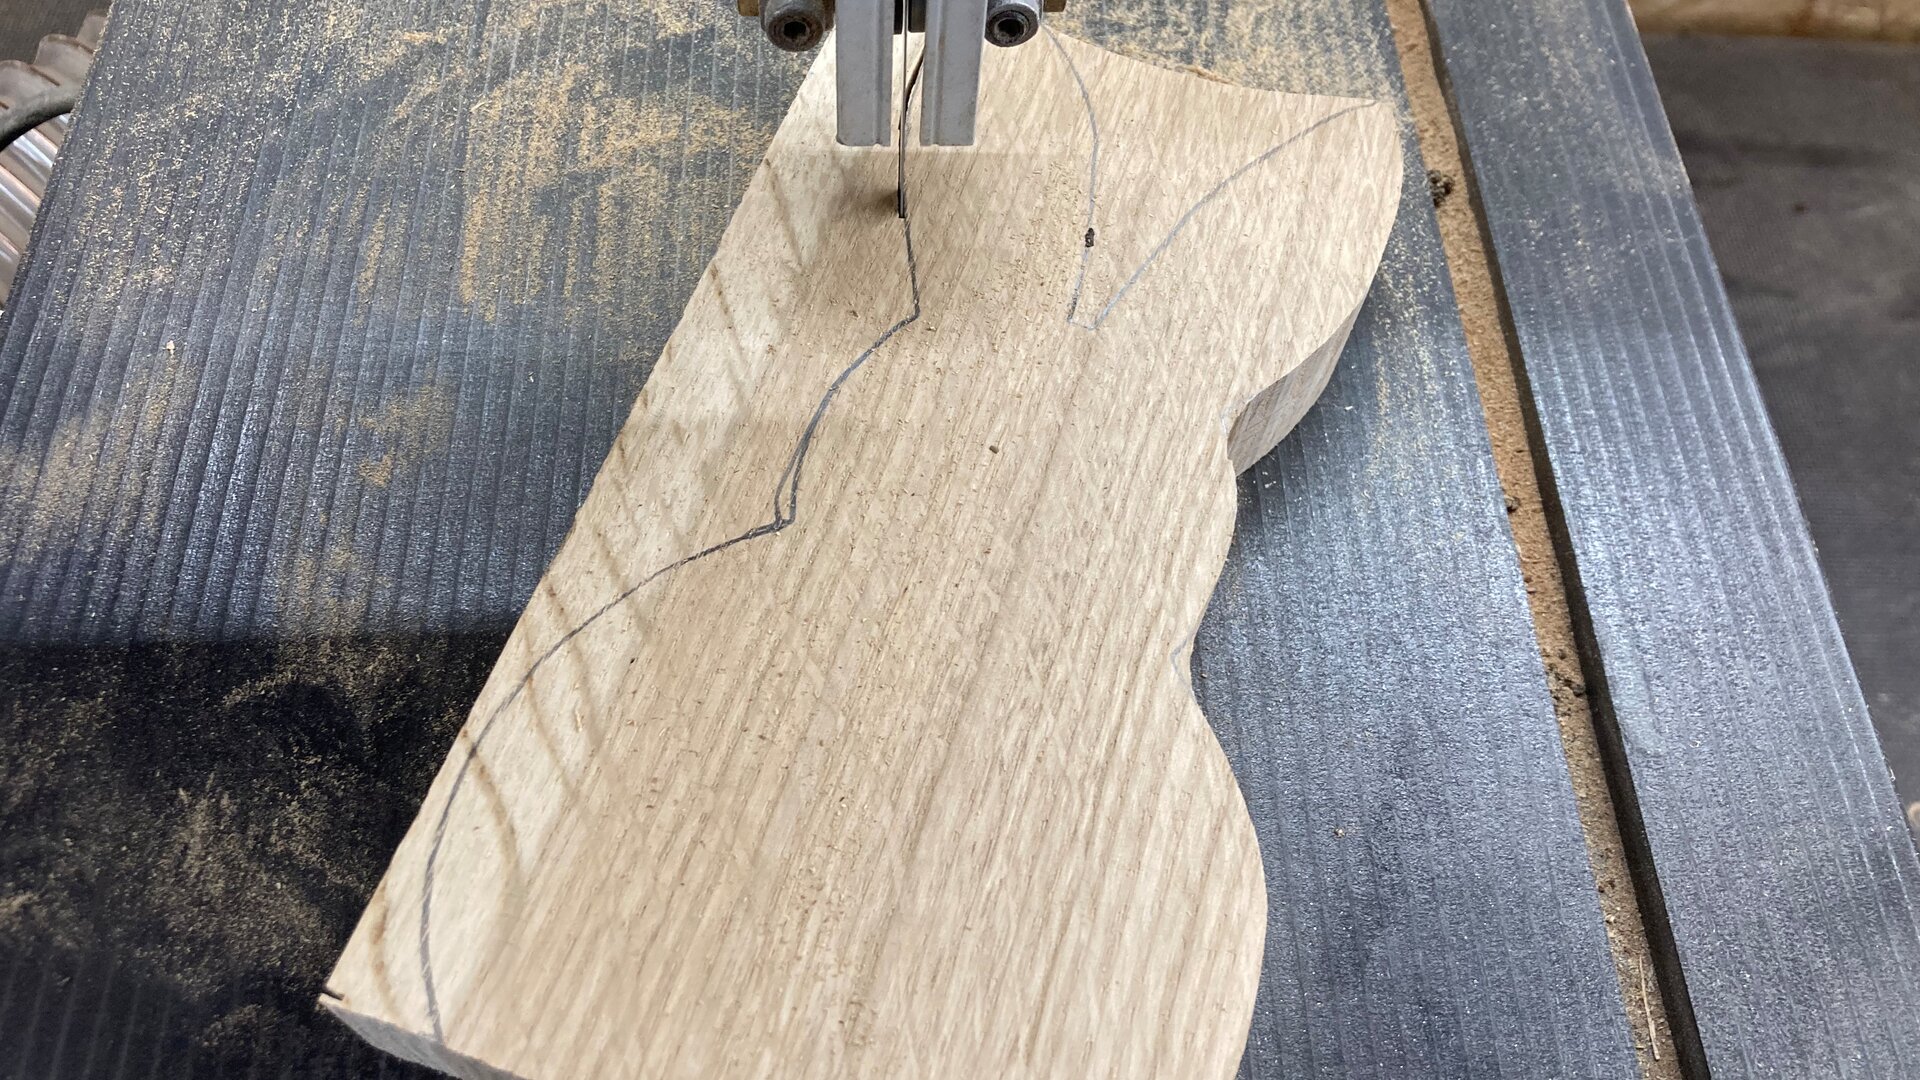
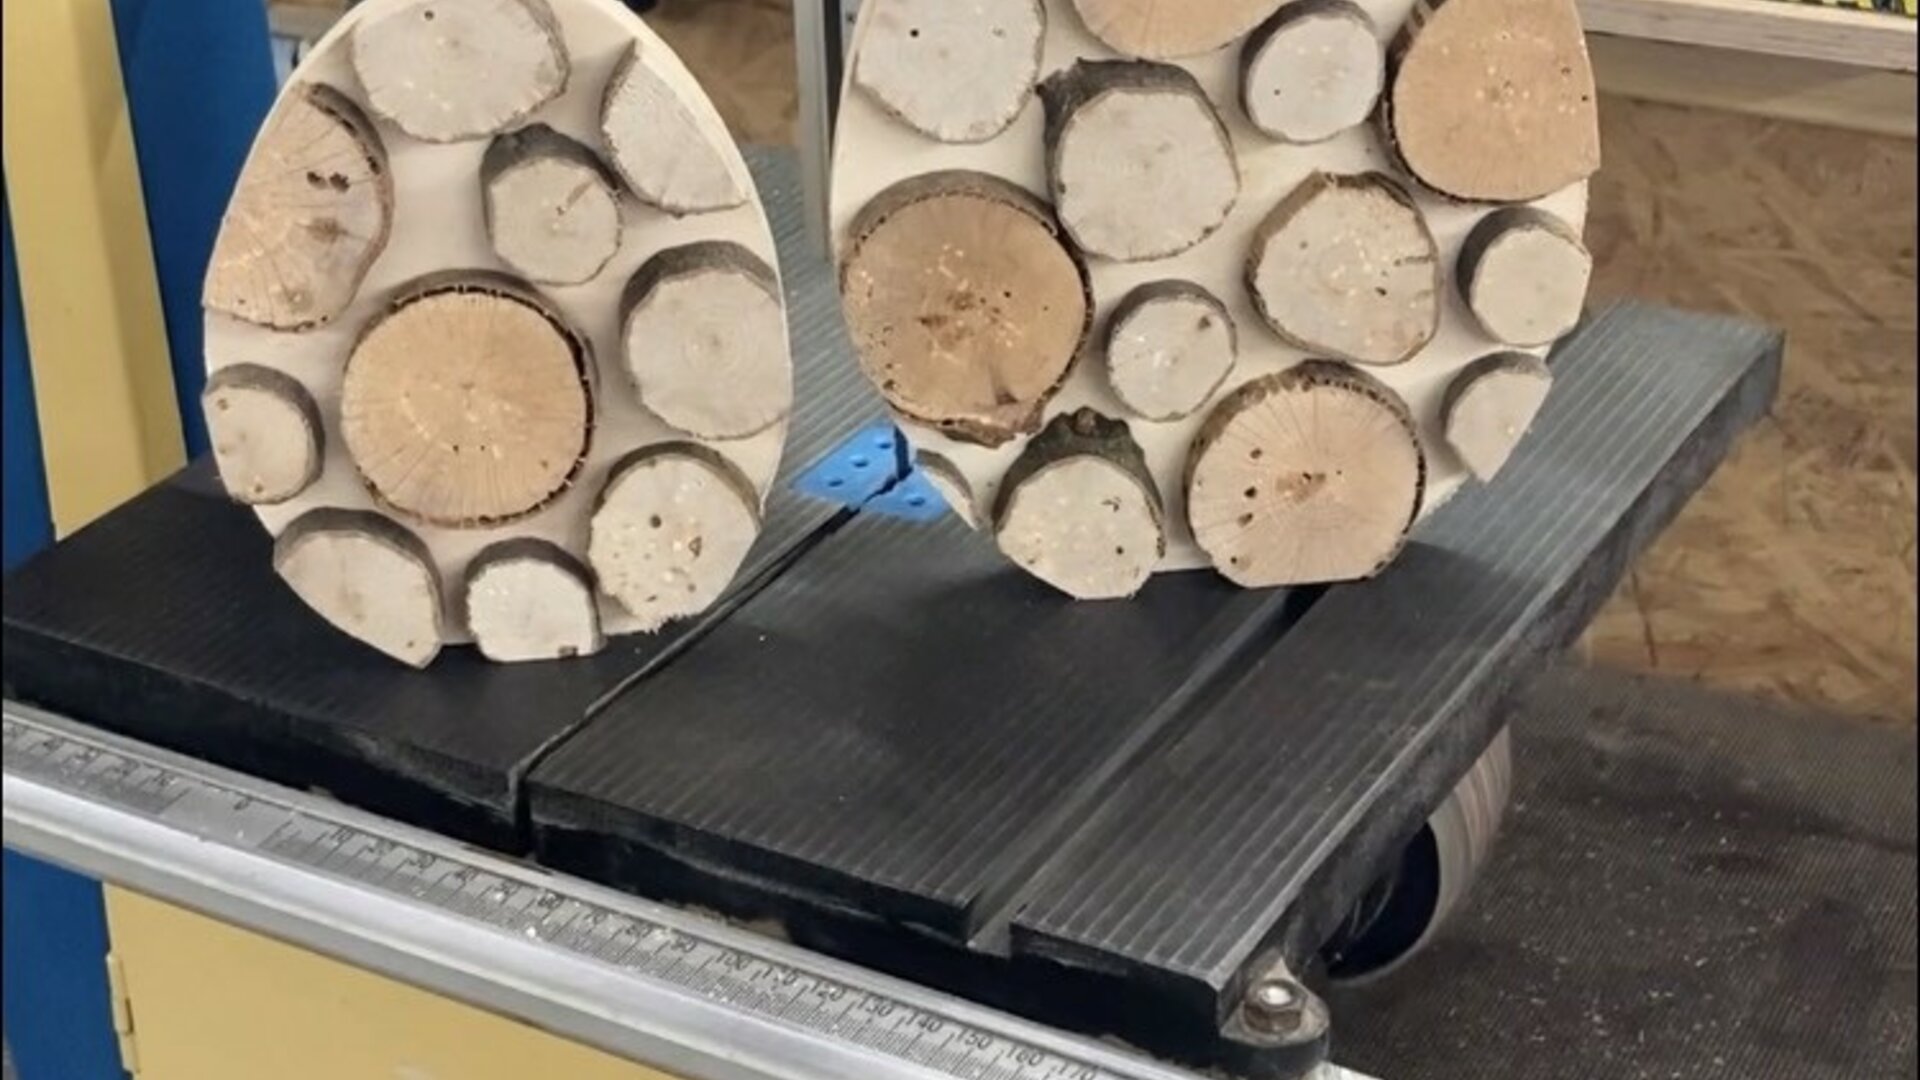
We now need our templates. (Download them here or draw them free-hand.) To draw the decorative Easter bunny, transfer the template design to the oak board with a pencil. To draw the Easter eggs, place the template on the plywood panel you’ve prepared, and also transfer the design using a pencil. Then use the band saw to cut out the shape.
Those who value a clean work place, can prevent unnecessary dust by using an extraction system. The scheppach DC100, for example, is perfect for this.
The following applies during sawing: It’s better to take your time and work carefully so you save yourself the effort of reworking later.


Once you have cut out the shape, sanding is next. The OSM600 sanding machine is perfect for the shape of the Easter eggs. The BTS700 belt and disc sander is ideal for sanding the decorative Easter bunny. Thanks to the narrow belt, narrow sections can be processed with ease. So the decorative bunny has a nice feel to it, it can also be sanded using a rotary sander, such as the COS125-20ProS. Do the final sanding by hand.


That’s all there is to creating your Easter decorations – a lovely eye-catcher for your home or as a self-made present. Enjoy following along.
scheppach
Bandsaw
scheppach
Belt & Spindle Sander Sander

scheppach
dust extraction system
scheppach
Random orbital sander
scheppach
Belt and disc sander