
-
Table of contents
- Step 1 – Digging the holes
- Step 2 – Everything plumb?
- Step 3 – Setting the anchors
- Step 4 – Installation
- Step 5 – Attaching the swing
-
List of materials
- 10 m bar, at least 8 x 8 cm thick
- 2 ground anchors
- Various screws
- Weather-proof paint
- 2 hooks
- 1 set for attachment
- Nest swing (or swing if desired)
- 3 x 25 kg sacks of concrete
- 1x M12 metal rod
-
Tools & machines
- Drill, centre bit and countersink
- Chop saw
- Cordless screwdriver/bits
- Single-handed digger, trowel
- Spirit level
- Guide line, line nails
- Mallet / hammer
- Brush
- Angle grinder
-
Protective gear
- Safety goggles
- Gloves
- Work clothing
- Hearing protection
- Step 1 – Digging the holes
- Step 2 – Everything plumb?
- Step 3 – Setting the anchors
- Step 4 – Installation
- Step 5 – Attaching the swing
Preparation
We first have to define the correct dimensions for the garden swing. These can vary according to the location and the space available there. In my case, the following dimensions turned out to be ideal:
- Height 208 cm
- Width 196 cm
- and depth 80 cm
I chose a bar thickness of 8 x 8 cm; of course, 9 x 9 or 10 x 10 would also work. Only less than 8 cm is not recommended in my opinion.

After all dimensions are clear, we can start to dig the holes for the foundations. A manual digger is ideally suited to this. In my case, the foundations had a diameter of around 20 cm and were around 40 cm deep. If you want to be really safe, make the holes 60-80 cm deep.


We’ll now insert the guide line in order to have a point of reference. I used two iron nails and a 2.5 m slat for this. We will set the anchors on the guide line in the next step. After we have aligned everything so that it is horizontal, we can start to mix the concrete.


Do not make the concrete’s consistency too liquid. Tip this into the holes that you dug and use a rod to compact it. Then set the U anchor. To do this, I put a pair of 2 cm thick timbers ready so that I could move the U anchors to the correct height and smooth the concrete surface. I left a gap of around 2 cm to the ground so that less moisture gets onto the anchors.


After drying for around 2 days, I installed the pre-assembled swing frame. I used the drying time to paint the wood with weather-proof paint. We can now concrete the lower cross members/support bars and screw them on. Small tip: I installed an iron bar at a right angle between the struts so that they are anchored solidly against the swinging direction. I sawed the cross members to a 45 degree angle and used 3 screws on the vertical frame to attach them. I also attached support bars to the top cross beam.


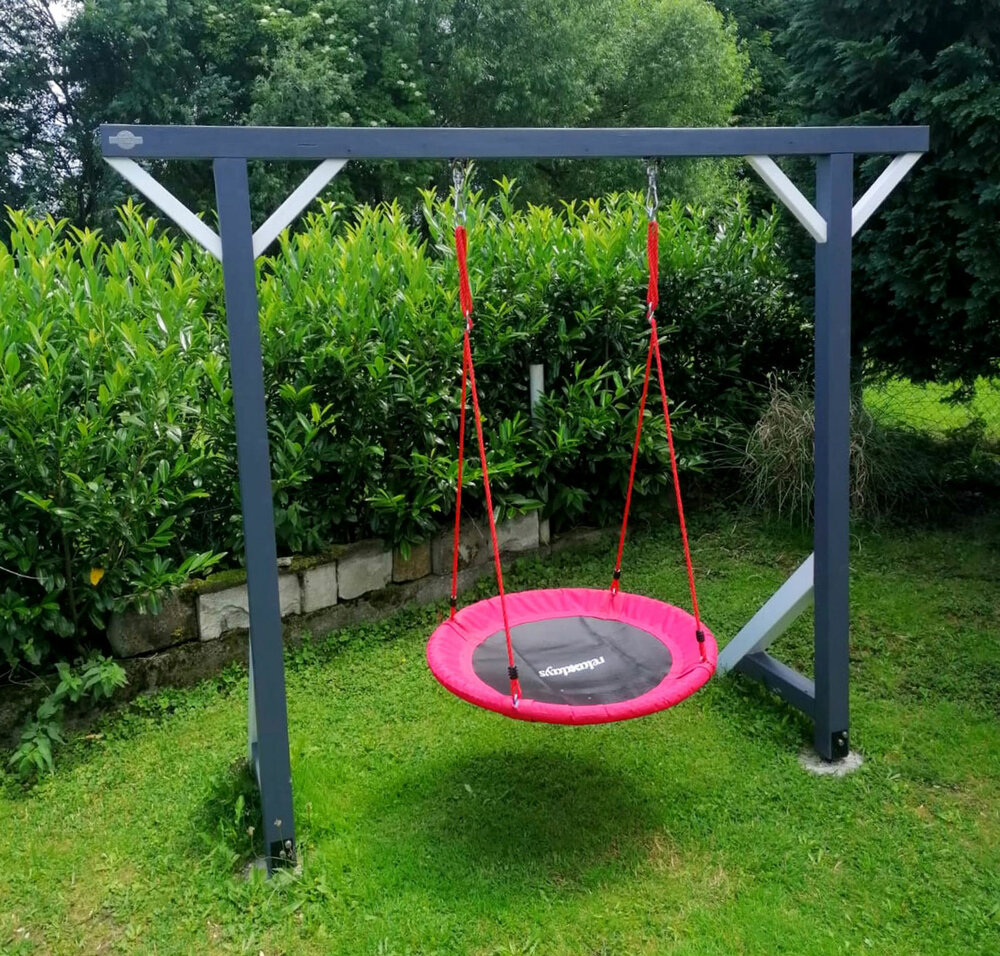
After another two days for drying, we can finally install the attachment for the swing. I ordered a set off the internet for this. It contained the hooks and carabiners. We can now attach and test the nest swing.
We now have a home-made swing that is build exactly according to the child’s and wife’s tastes and wishes.
scheppach
Paint and mortar mixer

scheppach
Battery screwdriver