
-
Table of contents
- Step 1 – sawing & sanding
- Step 2 – cutting the inner shape
- Step 3 – inserting the branches
- Step 4 - finish
-
List of materials
- Template (download)
- A beautiful piece of timber of the desired size
- Branches you have collected
- Wood finish
-
Tools/machines
- Sanding machine
- Band saw
- Jigsaw
- Abrasive paper
- Drill
-
Protective equipment
- Safety goggles
- Work clothing
- Hearing protection
- Step 1 – sawing & sanding
- Step 2 – cutting the inner shape
- Step 3 – inserting the branches
- Step 4 - finish


First, we need the template. (Download it here or draw it free-hand.) Transfer the template design to the timber using a pencil, then use the band saw to cut out the outer shape. The following applies: It’s better to take your time and work carefully so you save yourself the effort of reworking later. Once you have cut out the shape, sanding is next. The OSM600 sanding machine is perfect for this. Do the final sanding by hand.


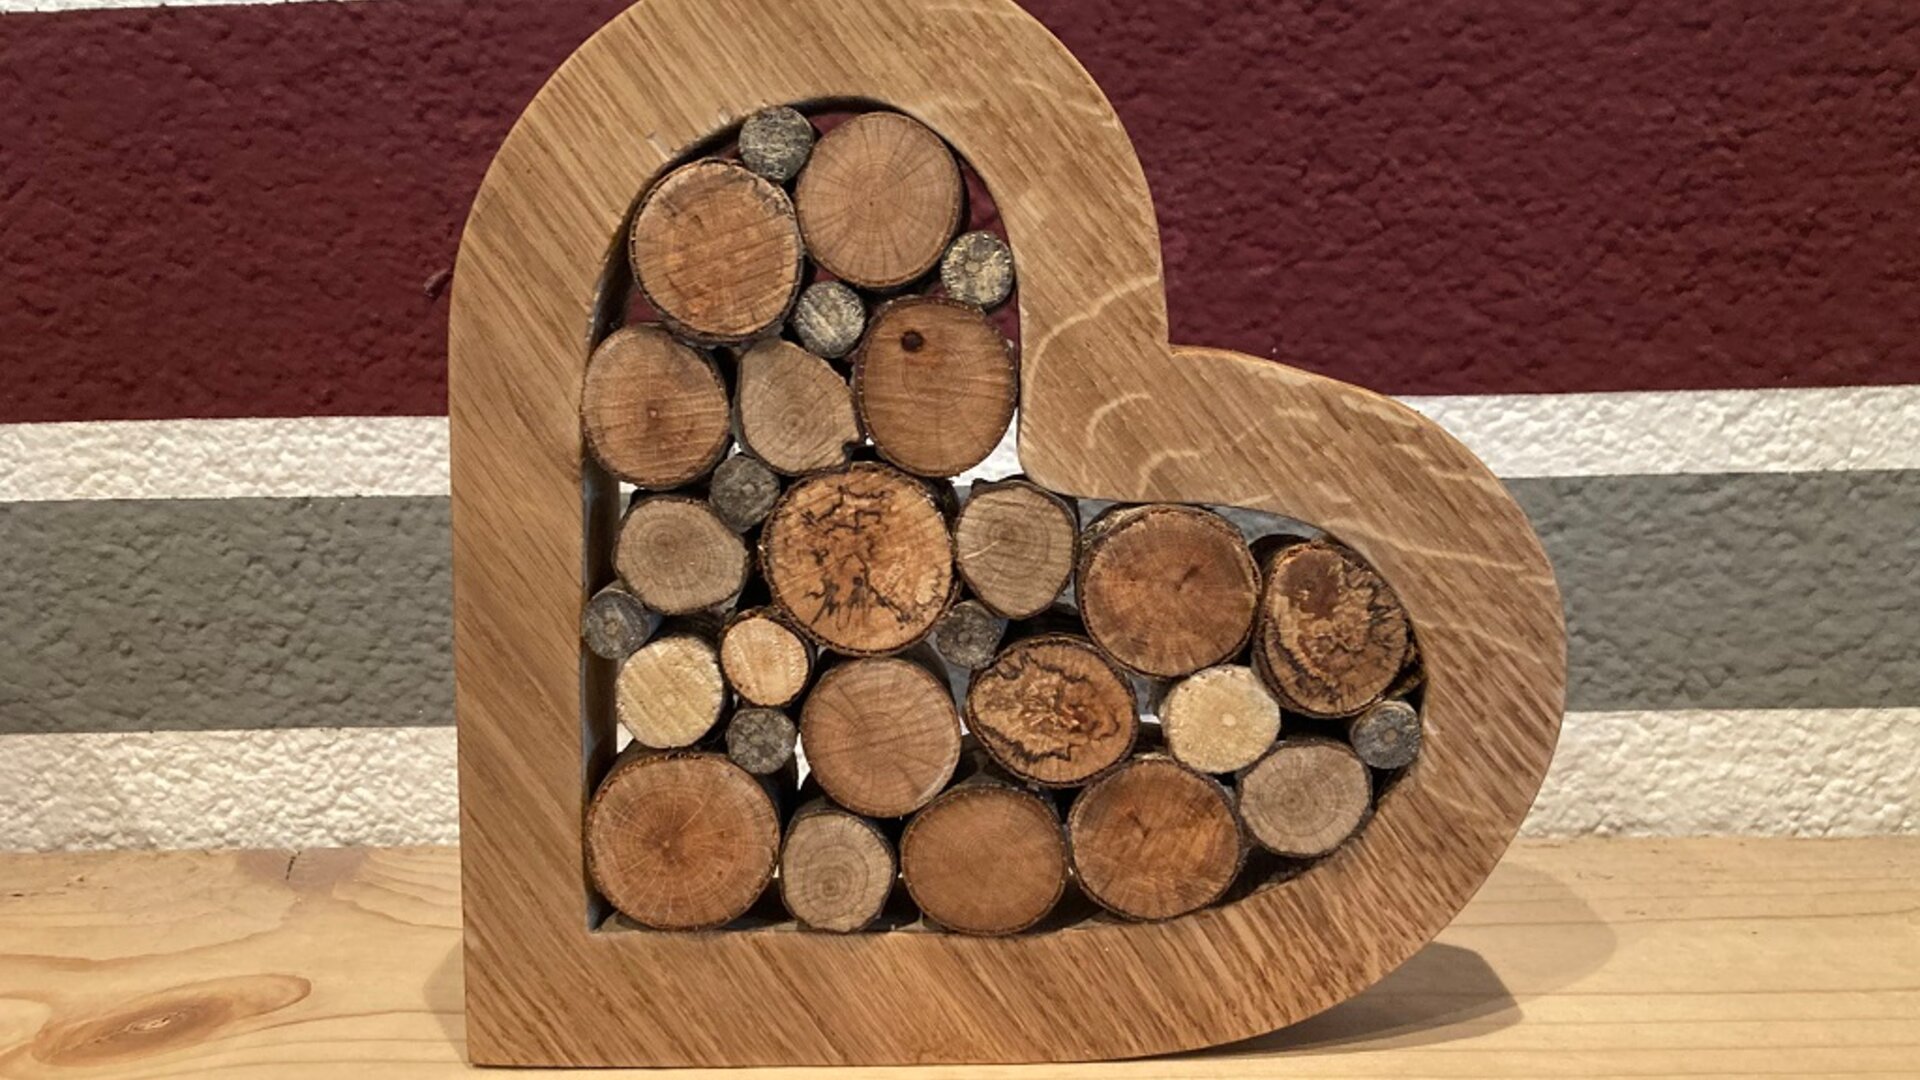
Now we can cut the inner heart shape. The jigsaw is best for this. First, we drill a few holes so working on the inside of the heart will be easier later. To sand the inner shape, I’m using the OSM600’s spindle function. That saves a lot of manual labour. At the end, we complete the final sanding by hand.


Collect a few beautiful, dry branches when you’re on a Sunday walk with your family. Cut them to the right length using the band saw. The length should match the depth of the heart you have sawn. A little tip: It’s best to cut a few extra branches to size. Insert the branches into the heart like a puzzle. You can experiment here so the branches are nice and tight and fit snugly. If in doubt, use instant adhesive.

In this final step, we treat the heart with surface finish, such as our crafting butter, and our highly personalised present for Mum is complete. This decorative heart is a true eye-catcher.