
-
Table of contents
- Step 1 - Planing
- Step 2 - Shaping
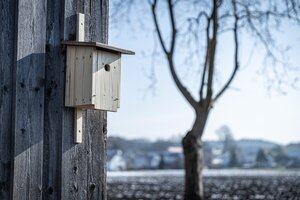
- Preliminary result
- Step 3 - Cutting
- Step 4 - Glueing
-
Material
- 1 spruce timber board, 220 cm length, 25 cm width, 2.2 cm thickness
To ensure easier handling, remove a piece of around 60 cm for the base panel. - Wood glue
- 1 spruce timber board, 220 cm length, 25 cm width, 2.2 cm thickness
-
Tools
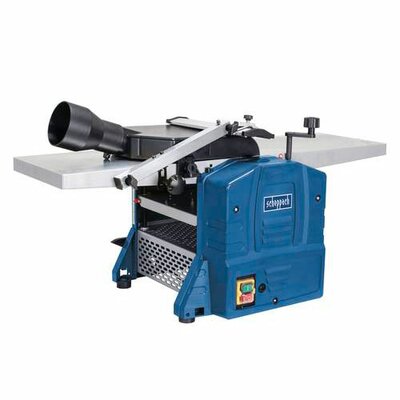
- Planer thicknesser (scheppach HMS1080)
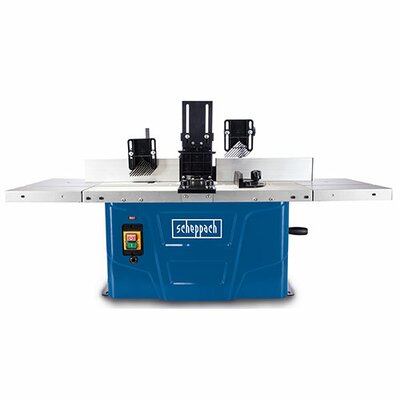
- Electric shaper and router table (scheppach HF50)
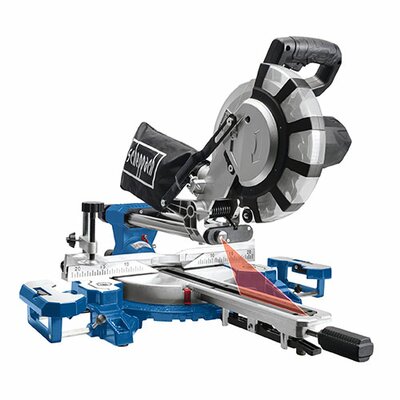
- Sliding mitre saw (scheppach HM254)
- Clamping device for securing during glueing
-
Protective equipment
When working with machinery in particular, wearing the appropriate protective equipment is obligatory.
You should not carry out any work without protecting your ears and eyes.
To protect yourself, you should also ensure the appropriate footwear and avoid wearing loose clothing and jewellery.
- Step 1 - Planing
- Step 2 - Shaping
- Preliminary result
- Step 3 - Cutting
- Step 4 - Glueing

In this example, an existing spruce timber board was used and planed with the HMS1080 planer thicknesser. Those who use sheet material, can skip this step and go straight to shaping.
After planing, we will have two spruce timber boards with the following dimensions:
one piece of spruce timber board measuring 60 cm x 25 cm, with a thickness of 12 mm and
one piece of spruce timber board measuring 160 cm x 25 cm, with a thickness of 19 mm
Put the smaller piece to one side and continue with the larger piece which will become the side panels.

Frayed areas caused by the work with the electric shaper and router mainly occur when the routing head leaves the material. That is why the parts that will become the side panels are processed “in one piece”.
We will work on the upper and lower edge with a rounding router from both sides. Additionally, we will insert a groove with the thickness of the base panel into one of the longitudinal sides.
In this case, it’s a groove of 12 mm, about 25 mm from the edge, with a depth of 7 mm.

This is what your current result should look like: you can clearly see the rounded edges and the 12 mm groove.

Cut the side panels with a sliding mitre saw at an angle of 45°. The fixing point is the inside dimension of the box you want to create. My box has inside dimensions of 56 cm x 23 cm. The outside dimensions of the side panels are bigger, of course, because the sections are cut at an angle of 45°.
The base panel is cut to the inside dimensions of the box plus twice the depth of the groove you shaped. In my case: 56 cm x 23 cm plus 7 mm on all sides, i.e. 57.4 cm x 24.4 cm.


After intermediate sanding, the cut sections are glued and secured until the glue has set. Sand the box again and, if you like, add a surface finish.
scheppach
Planer / Thicknesser
scheppach
Slide Compound Mitre Saw
scheppach
Table milling machine